Creamy garlic shrimp pasta family dinners don’t have to be complicated or take forever. I’m talking about a rich, buttery pasta that comes together faster than ordering takeout, and honestly, tastes way better. This dish hits that sweet spot between fancy enough for guests and simple enough for a random Tuesday night.
Here’s the thing—my family devours this every single time I make it. The shrimp cooks in minutes, the sauce comes together while your pasta’s boiling, and cleanup is minimal. Plus, you can have everything on the table in about 20 minutes, which is huge on nights when everyone’s starving.
If you love quick pasta recipes that actually satisfy, bookmark this for meal prep day. It’s the kind of recipe you’ll make twice in one week and not get sick of. Save this for later!
Why this creamy garlic shrimp pasta family recipe works
Ever wondered why restaurant shrimp pasta tastes so good? The butter and cream do most of the heavy lifting, plus fresh garlic that actually fills your kitchen with an amazing smell. I watched my 6-year-old ask for thirds last week, which basically never happens with seafood.
- Shrimp cooks in under 3 minutes, making this genuinely quick pasta for busy weeknights
- Garlic-butter base builds massive flavor with zero fussy ingredients
- Heavy cream creates silky sauce that coats every strand perfectly
- Frozen peas add color and veggies without extra prep work
Ingredients for creamy garlic shrimp pasta family

- 8 oz shrimp, peeled and deveined
- 8 oz linguine pasta
- 2 tbsp butter
- 3 cloves garlic, minced
- 1 tbsp olive oil
- 1/2 cup chicken broth
- 1/2 cup heavy cream
- 1/2 cup grated Parmesan cheese
- 1/2 cup frozen peas
- 1 tsp dried oregano
- 1/4 tsp red pepper flakes
- 2 tbsp fresh parsley, chopped
- 1/4 tsp salt
- 1/4 tsp black pepper
Not a linguine person? Fettuccine or penne work just as well with this creamy garlic shrimp pasta family sauce. Some people swap heavy cream for half-and-half to cut calories, though you’ll lose a little of that luxurious texture.
If you can’t find fresh shrimp, frozen ones thaw quickly under cold running water and work perfectly fine. Skip the red pepper flakes if your family doesn’t do spice, or honestly, double them if you like heat. The beauty of this dish is how forgiving it actually is—taste and adjust as you go.
Step-by-step instructions
1. Bring a large pot of salted water to a boil and add your linguine pasta. Cook according to package directions until al dente, then drain but don’t rinse it—the starch helps the sauce cling. This usually takes about 9 to 11 minutes, so set a timer so you don’t overcook it.
2. While the pasta cooks, heat 1 tbsp olive oil and 2 tbsp butter in a large skillet over medium-high heat. Once the butter melts and the pan gets hot, you’re ready for the shrimp. Make sure your heat isn’t cranked all the way up or the garlic will burn before the shrimp finishes cooking.
3. Add your 3 minced garlic cloves to the hot pan and stir constantly for about 30 seconds until it smells incredible. Don’t panic if the garlic looks a tiny bit brown at the edges—that’s actually flavor. Pour in the 8 oz of shrimp and sprinkle with salt and pepper, then let them sear for 1 to 2 minutes on each side.
4. Flip the shrimp and cook the other side until they turn pink and opaque, which takes about another 1 to 2 minutes. You want them cooked through but not rubbery, so don’t walk away during this part. This is when I usually add the 1/4 tsp red pepper flakes and 1 tsp oregano to the creamy garlic shrimp pasta family base.
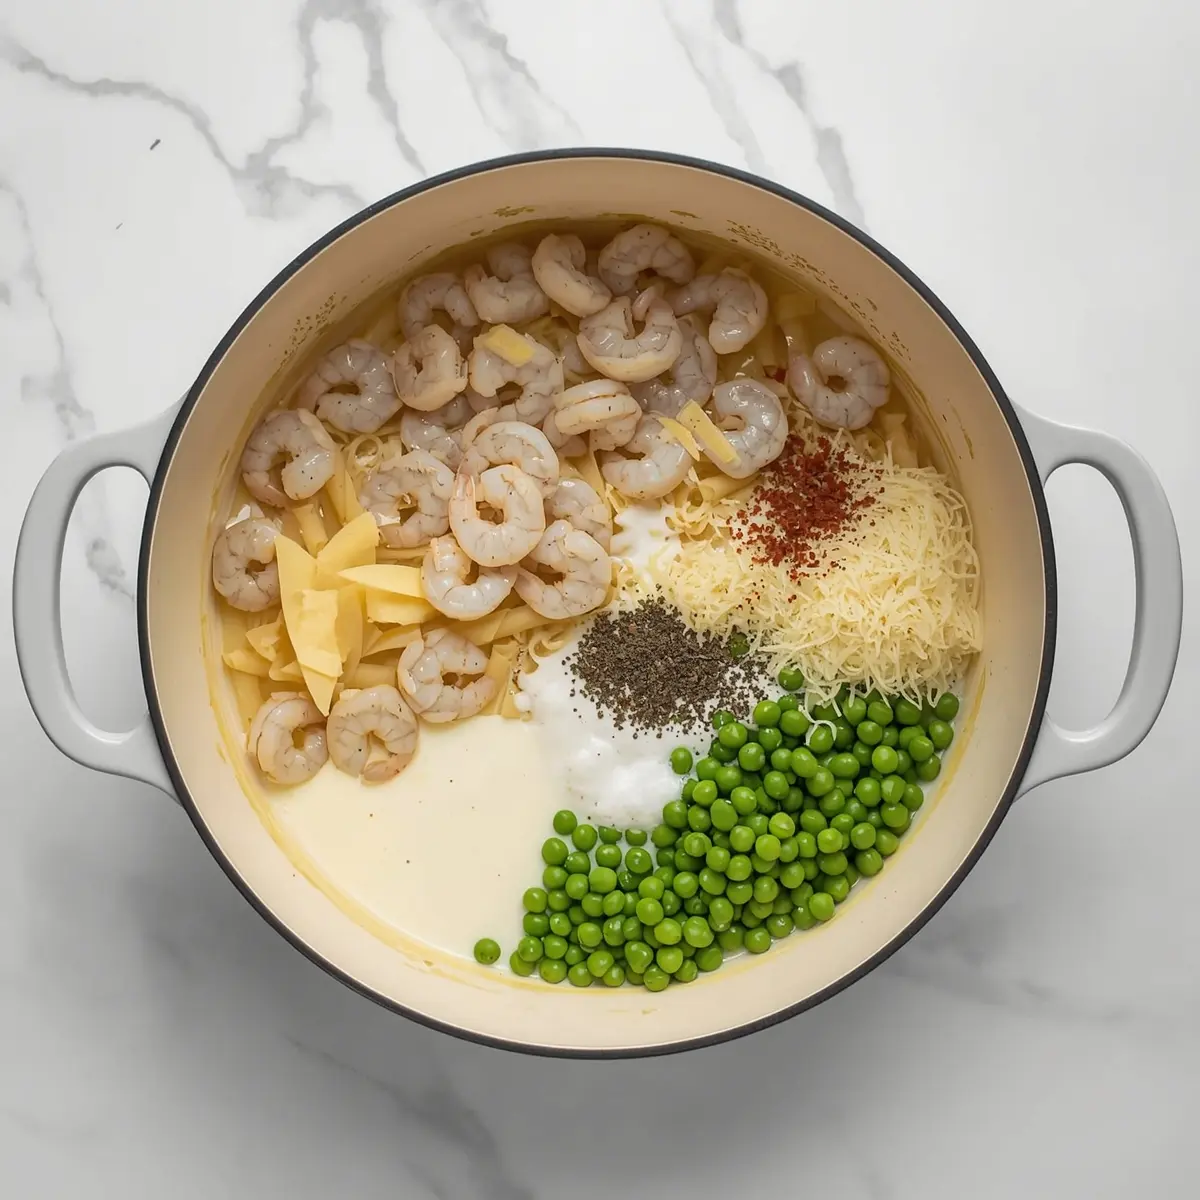
5. Pour in the 1/2 cup chicken broth and let it simmer for about a minute while you scrape up any brown bits from the bottom of the pan. These bits are pure flavor, honestly. Then add your 1/2 cup heavy cream and stir everything together until it looks smooth and gorgeous.
6. Add the 1/2 cup frozen peas directly to the sauce and let them warm through for about a minute—they thaw fast. Stir in your 1/2 cup grated Parmesan cheese and keep stirring until the cheese melts completely into a silky sauce. Taste it and adjust the salt and pepper if needed.
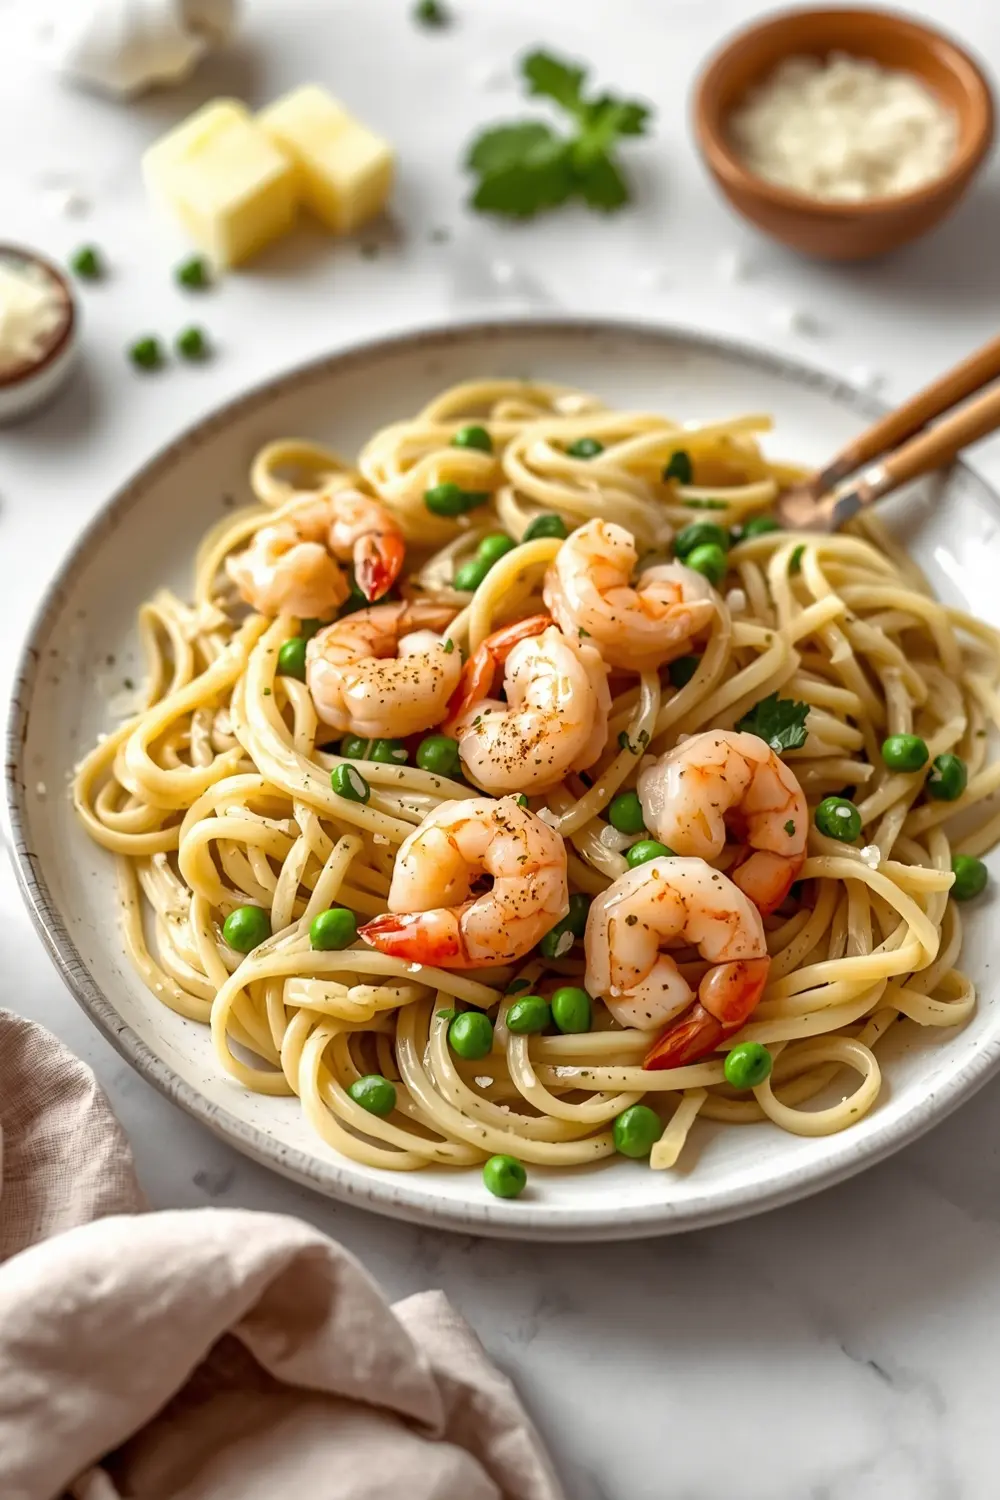
7. Add the cooked pasta directly to the skillet and toss everything together until each strand is coated with that creamy sauce. If it looks a little thick, add a splash of pasta water to loosen it up—it’ll continue thickening as it sits. Divide into bowls and top with fresh parsley, then serve immediately while it’s hot.
Serving ideas for creamy garlic shrimp pasta family
Perfect pairings make this 20 minute weeknight meal feel more complete.
Garlic Bread with Herbs
Warm Italian bread brushed with garlic-butter and fresh herbs cuts through the richness and gives you something to soak up extra sauce. Honestly, this is non-negotiable in my house—my kids fight over the last piece. It takes five minutes max to throw together.
Fresh Garden Salad
Crisp greens with a light lemon vinaigrette provide brightness that balances the creamy sauce beautifully. Arugula or mixed greens work great, and it keeps the meal feeling balanced. Check out our easy salad recipes for inspiration if you want something fancier.
Steamed Broccoli or Green Beans
Simple roasted or steamed vegetables add texture and help fill out the plate without competing with the creamy garlic shrimp pasta family flavors. A drizzle of olive oil and a sprinkle of salt is all you need. This is how I sneak extra veggies past the picky eaters.
Pro tips for perfect creamy garlic shrimp pasta family
Storage tips
– Keep leftovers in an airtight container in the fridge for up to 3 days
– Reheat gently on the stovetop with a splash of cream to restore sauce texture
– Freezing isn’t ideal because the shrimp gets tough, so eat it fresh
Make-ahead instructions
– Mince your garlic and chop parsley the night before—keeps things moving
– Cook pasta a few hours ahead and toss with olive oil to prevent sticking
– You can marinate shrimp in a bit of lemon juice while you work on other tasks
Variations
– Swap shrimp for scallops or white fish for different easy seafood family options
– Add sun-dried tomatoes or spinach for extra flavor and veggies
– Stir in a squeeze of fresh lemon juice for brightness at the end if you want zing
Troubleshooting
– If sauce looks watery, let it simmer an extra minute and the cream will thicken it up
– Shrimp overcooked and rubbery? That means your heat was too high—medium-high is the sweet spot
– Pasta too thick? Add pasta water one tablespoon at a time until it reaches sauce consistency
Frequently asked questions
Can I freeze leftover creamy garlic shrimp pasta family?
Technically yes, but it’s not ideal—the shrimp gets tough and the sauce breaks down a little. Keep it in the fridge instead and eat it within 3 days, then you’ll get the best texture and taste. If you absolutely must freeze it, store it in an airtight container and thaw overnight in the fridge, then reheat gently.
What can I substitute for heavy cream?
Half-and-half works fine and cuts calories, though the sauce won’t be quite as luxurious. Greek yogurt mixed with a little cornstarch creates a similar creamy texture if you’re going for lighter. Some people use coconut cream too, which adds a subtle sweetness to your quick pasta dinner.
How do I reheat this without drying out the shrimp?
Low and slow is your friend—reheat on the stovetop over medium heat with a splash of heavy cream or chicken broth stirred in. Don’t use the microwave because it’ll overcook the shrimp further and make it rubbery. It takes about 5 minutes to warm through, and you’ll avoid that dried-out texture.
Can I make this without shrimp for an easy seafood family alternative?
Absolutely—white fish, scallops, or even chicken breast work great in this creamy garlic sauce. Cook chicken a few minutes longer since it takes more time than shrimp. The cooking time changes slightly depending on what protein you pick, so adjust accordingly.
Final thoughts
This creamy garlic shrimp pasta family recipe proves you don’t need hours in the kitchen to serve something restaurant-quality and impressive. My biggest win with this dish is how my family actually asks for it again—not for a special occasion, but for random weeknights when everyone’s tired and hungry.
The best part? You’ll have it on the table in 20 minutes without chaos or a sink full of dishes. It’s become our go-to when we want something that feels fancier than usual but doesn’t stress me out.
Need more quick pasta inspiration? Head over to our pasta collection for other weeknight winners. Make this soon and tag us with how it turns out—we’d love to see it!
Easy 20-Minute Creamy Garlic Shrimp Pasta the Whole Family Will Love
Ingredients
Method
- Bring a large pot of salted water to a boil and add your linguine pasta. Cook according to package directions until al dente, then drain but don’t rinse it—the starch helps the sauce cling. This usually takes about 9 to 11 minutes, so set a timer so you don’t overcook it.
- While the pasta cooks, heat 1 tbsp olive oil and 2 tbsp butter in a large skillet over medium-high heat. Once the butter melts and the pan gets hot, you’re ready for the shrimp. Make sure your heat isn’t cranked all the way up or the garlic will burn before the shrimp finishes cooking.
- Add your 3 minced garlic cloves to the hot pan and stir constantly for about 30 seconds until it smells incredible. Don’t panic if the garlic looks a tiny bit brown at the edges—that’s actually flavor. Pour in the 8 oz of shrimp and sprinkle with salt and pepper, then let them sear for 1 to 2 minutes on each side.
- Flip the shrimp and cook the other side until they turn pink and opaque, which takes about another 1 to 2 minutes. You want them cooked through but not rubbery, so don’t walk away during this part. This is when I usually add the 1/4 tsp red pepper flakes and 1 tsp oregano to the creamy garlic shrimp pasta family base.
- Pour in the 1/2 cup chicken broth and let it simmer for about a minute while you scrape up any brown bits from the bottom of the pan. These bits are pure flavor, honestly. Then add your 1/2 cup heavy cream and stir everything together until it looks smooth and gorgeous.
- Add the 1/2 cup frozen peas directly to the sauce and let them warm through for about a minute—they thaw fast. Stir in your 1/2 cup grated Parmesan cheese and keep stirring until the cheese melts completely into a silky sauce. Taste it and adjust the salt and pepper if needed.
- Add the cooked pasta directly to the skillet and toss everything together until each strand is coated with that creamy sauce. If it looks a little thick, add a splash of pasta water to loosen it up—it’ll continue thickening as it sits. Divide into bowls and top with fresh parsley, then serve immediately while it’s hot.